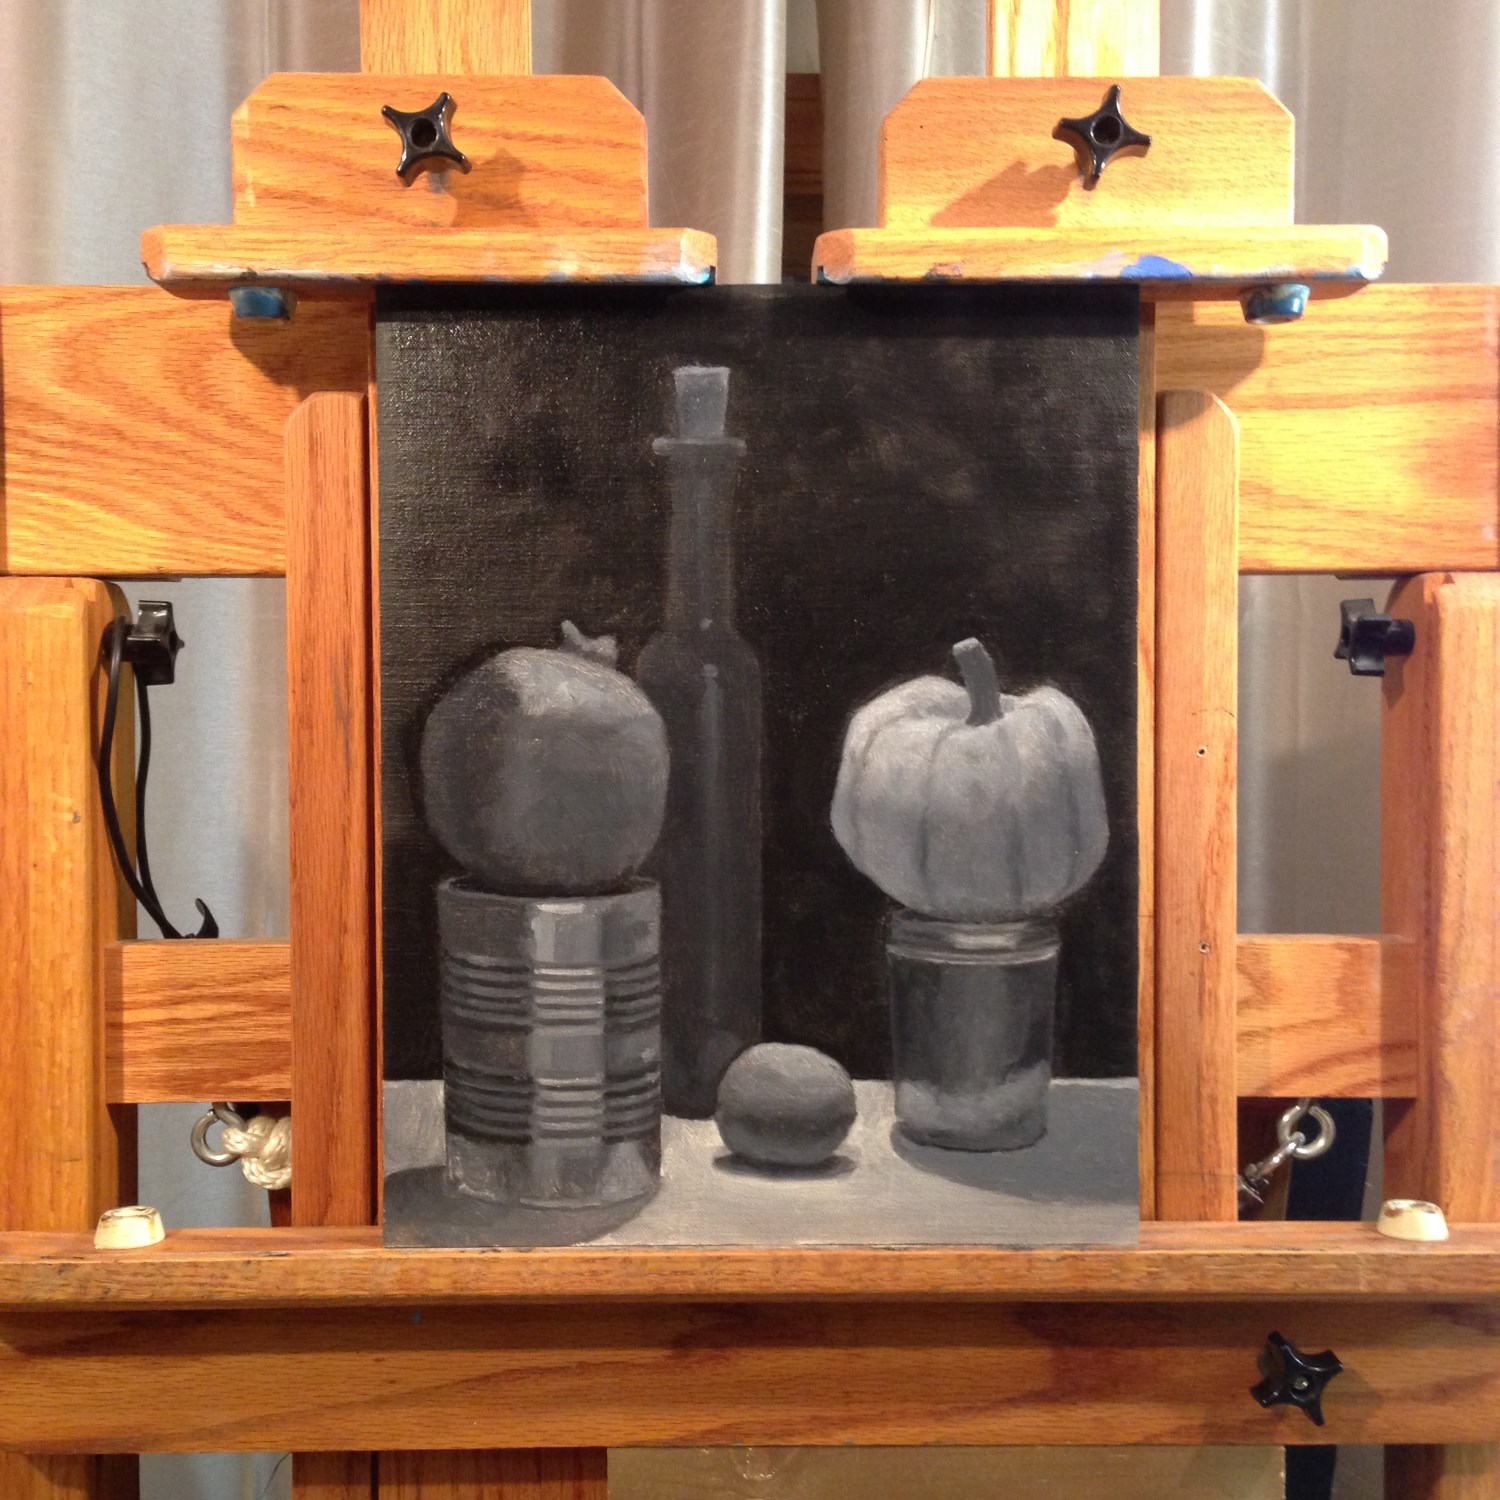
The second step (after the drawing) for this week’s painting is complete. It’s a straightforward grisaille (gray painting) – probably the most common form of underpainting – using only Mars Black and Lead White. These are quick drying paints – an important consideration since I’m on a tight schedule with these weekly paintings. Ideally it should be ready for the next layer the next day. To help speed drying, I work with very thin layers and avoid adding any oils or mediums – just turpentine to thin the paint.
Underpaintings help with modeling the forms – giving the objects a sense of 3 dimensions. They also establish the values – the patterns of light and dark throughout the painting. It’s all about major shapes at this point.
The level of detail to include is very much a judgement call. Including too many details early on can bog down the process in later stages – fine detail work on top of fine detail work can just get fussy. On the other hand, saving important details for the end can introduce problems that could have been solved at the beginning. I always try to think about those two considerations when deciding what to include in the underpainting.
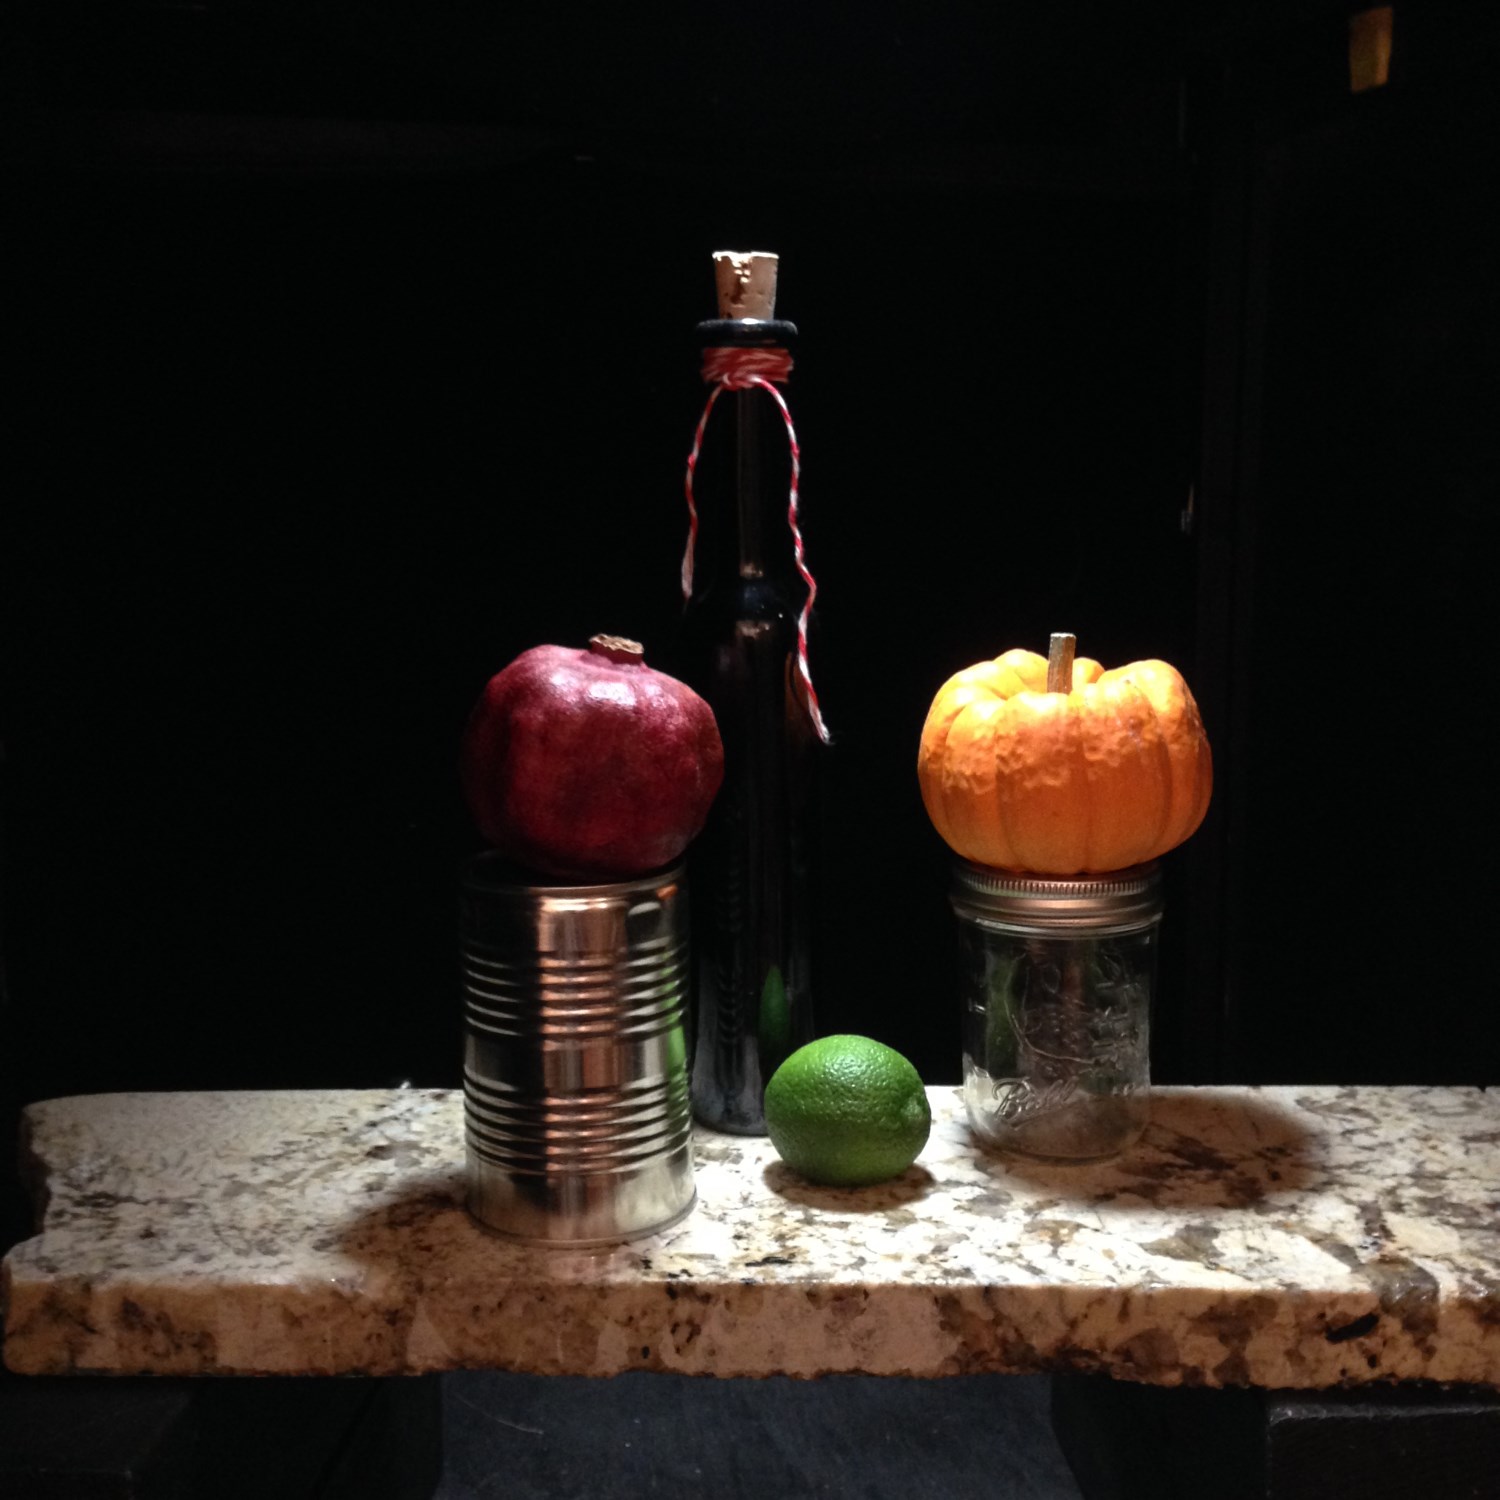
There’s a lot of detail that I left out of this week’s underpainting (see the image of the model below). For instance, the string tied around the neck of the bottle will be an easy thing to paint freehand at the end. I also saw no reason to include the fine features on the mason jar at right. Both can easily be handled at the end.
The ridges running around the tin can at left, though, were a different story. They’re an important feature for defining the object. It would also be easy to get the perspective wrong. I decided to get it correct at the beginning and save myself potential trouble at the end.
Once dry to the touch, it will be on to the color layer.